Guide to Machine Embroidered Hats
Machine embroidered hats have become one of the most popular ways to create stylish, personalized, and professional-looking headwear. Whether you're customizing caps for a business, sports team, fashion brand, or personal project, knowing the right techniques can make all the difference.
This Guide to machine embroidered hats walks you through everything you need to know—from choosing the right hat and stabilizer to digitizing designs and avoiding common embroidery mistakes. Whether you're a beginner or looking to improve your embroidery quality, you'll find practical tips that help every stitch count.
What Are Machine Embroidered Hats?
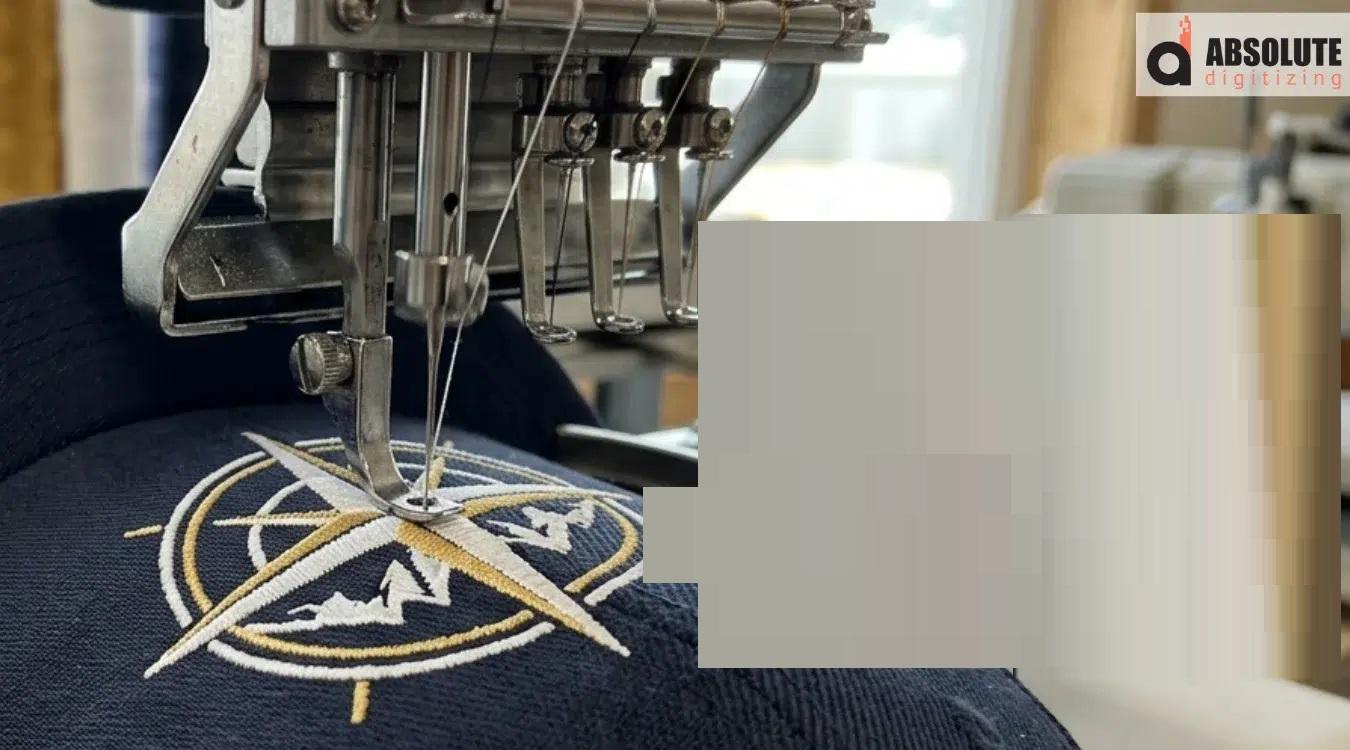
Machine embroidered hats are caps decorated using embroidery machines that stitch designs directly onto the fabric. Unlike printed graphics, embroidery creates a textured, durable finish that withstands daily wear and repeated washing.
Popular embroidered hat styles include:
-
Baseball caps
-
Snapback hats
-
Trucker caps
-
Dad hats
-
Beanies
-
Bucket hats
-
Performance caps
Because hats have curved surfaces and structured fronts, they require different embroidery techniques than flat garments like T-shirts.
Why Choose Machine Embroidery for Hats?
Embroidery offers several advantages over other decoration methods.
Long-lasting Results
High-quality thread resists fading, peeling, and cracking, making embroidered hats extremely durable.
Premium Appearance
Raised stitching gives hats a professional and luxurious look that customers appreciate.
Excellent Brand Visibility
Logos stitched onto hats remain sharp and attractive even after years of use.
Great for Customization
Machine embroidery makes it easy to personalize hats with:
-
Company logos
-
Team names
-
Monograms
-
Custom artwork
-
Promotional designs
Choosing the Right Hat for Embroidery
Not every hat produces the same embroidery results.
Consider these factors before starting.
Structured vs. Unstructured Hats
Structured hats have reinforced front panels that provide a stable surface for embroidery.
Unstructured hats are softer and may require additional stabilization.
Fabric Types
Common embroidery-friendly materials include:
-
Cotton twill
-
Canvas
-
Polyester
-
Acrylic blends
-
Wool blends
Each fabric reacts differently to stitching, so proper testing is always recommended.
Hat Profile
Hat profiles affect embroidery placement.
-
Low-profile caps have shallower crowns.
-
Mid-profile caps offer balanced embroidery space.
-
High-profile caps provide larger design areas.
Essential Supplies for Machine Embroidered Hats
Successful hat embroidery starts with the right tools.
You'll typically need:
-
Embroidery machine with cap attachment
-
Hat hoop or cap frame
-
Quality embroidery thread
-
Sharp embroidery needles
-
Tear-away or cut-away stabilizer
-
Curved cap driver (if supported)
-
Digitized embroidery design
-
Small embroidery scissors
Using quality supplies reduces thread breaks and improves stitch consistency.
Why Digitizing Matters
One of the biggest secrets behind beautiful embroidered hats is proper embroidery digitizing.
Digitizing converts artwork into stitch instructions that embroidery machines can read. Since hats have curved surfaces, standard flat embroidery files often don't stitch well.
Professional hat digitizing includes:
Poor digitizing often causes uneven stitches, gaps, thread breaks, and distorted logos.
Preparing Your Hat Before Embroidery
Preparation plays a major role in embroidery quality.
Before stitching:
-
Inspect the hat for defects.
-
Choose the correct stabilizer.
-
Secure the hat firmly in the cap frame.
-
Confirm needle alignment.
-
Load the correct embroidery design.
-
Run a trace to verify placement.
Taking a few extra minutes during setup can prevent costly mistakes later.
Best Design Placement for Hats
Correct placement makes embroidery look balanced and professional.
Common embroidery locations include:
Front Center
The most popular location for logos and branding.
Left Panel
Ideal for company names or smaller graphics.
Right Panel
Often used for promotional logos or decorative designs.
Back of the Hat
Perfect for names, websites, or small text.
Side Panels
Suitable for sports teams and fashion branding.
Always measure the embroidery area before digitizing your artwork.
Best Design Size for Hat Embroidery
Oversized designs can wrinkle the fabric, while very small designs may lose detail.
General recommendations:
-
Width: 2.0–4.25 inches
-
Height: 1.75–2.5 inches
These dimensions vary depending on the hat style and embroidery machine.
Tips for Better Machine Embroidered Hats
Even experienced embroiderers follow a few best practices.
Use Hat-Specific Digitizing
Designs created specifically for caps stitch more cleanly than flat embroidery files.
Keep Small Text Simple
Very tiny lettering becomes difficult to read.
Choose larger fonts with enough spacing.
Reduce Excessive Stitch Density
Too many stitches can create puckering and thread breaks.
Select the Correct Needle
Match the needle size to the fabric and thread weight.
Test Before Production
Always stitch a sample before embroidering multiple hats.
Testing saves time, materials, and frustration.
Common Mistakes to Avoid
Many embroidery issues come from avoidable mistakes.
Watch out for:
Avoiding these problems improves consistency and reduces production errors.
Caring for Machine Embroidered Hats
Proper care helps embroidered hats maintain their appearance.
Follow these simple tips:
-
Spot clean whenever possible.
-
Wash gently by hand.
-
Avoid harsh bleach.
-
Let hats air dry naturally.
-
Store them away from direct sunlight.
-
Avoid crushing embroidered areas.
Good maintenance keeps stitches vibrant for years.
How Professional Digitizing Improves Hat Embroidery
Even the best embroidery machine cannot compensate for a poorly digitized file.
Professional embroidery digitizing offers:
-
Cleaner outlines
-
Better stitch flow
-
Fewer thread breaks
-
Improved fabric stability
-
Accurate logo reproduction
-
Faster machine performance
At Absolute Digitizing, experienced digitizers optimize every design specifically for hats, ensuring smooth production and professional-looking embroidery on a wide range of cap styles.
Who Can Benefit from Machine Embroidered Hats?
Machine embroidered hats are ideal for:
Whether you're creating one hat or producing hundreds, quality embroidery enhances the final product.
Final Thoughts
Creating professional machine embroidered hats requires more than simply loading a design into an embroidery machine. The right hat, quality materials, proper stabilizers, accurate placement, and expert digitizing all work together to produce clean, durable, and attractive results.
By following this Guide to machine embroidered hats, you'll avoid common mistakes, improve embroidery quality, and create caps that customers will proudly wear. If you want consistently sharp embroidery, partnering with experienced professionals like Absolute Digitizing for high-quality embroidery digitizing can make every project smoother and more successful.
Frequently Asked Questions (FAQs)
1. What is the best fabric for machine embroidered hats?
Cotton twill, polyester, canvas, and structured cap materials generally provide the best embroidery results because they offer excellent stability during stitching.
2. Why do embroidered hats sometimes wrinkle?
Wrinkling usually occurs because of excessive stitch density, improper stabilizer selection, poor hooping, or incorrect digitizing.
3. Can every embroidery design be used on hats?
No. Hat embroidery requires specially digitized files that account for the curved surface and limited stitching area.
4. What stabilizer should I use for embroidered hats?
The choice depends on the hat material. Structured hats often work well with tear-away stabilizer, while softer hats may benefit from cut-away stabilizer for added support.
5. Why is professional digitizing important for hat embroidery?
Professional digitizing ensures proper stitch direction, balanced density, clean lettering, and smooth machine operation, resulting in higher-quality embroidered hats with fewer production issues.


Share this page with your family and friends.